
What you need
- A Mac running macOS (Apple Silicon or Intel). The desktop app is macOS-only for now.
- At least one coding agent installed and signed in on that Mac:
- Claude Code — the
claudecommand, or - Codex — the
codexcommand. Codex support is marked beta in the app.
- Claude Code — the
- A Sightdeck AI license for unlimited tasks. Without one, the app runs in trial mode with a limited number of free tasks. Prices are in the pricing section.
Install the desktop app
- Open the download section on the homepage and pick the build for your Mac (Apple Silicon or Intel).
- Open the
.dmgand drag Sightdeck AI into Applications. - Launch it. The first screen is Welcome to Sightdeck AI. Under it, Finish setup: a provider, its agent & the task instructions lists three steps.
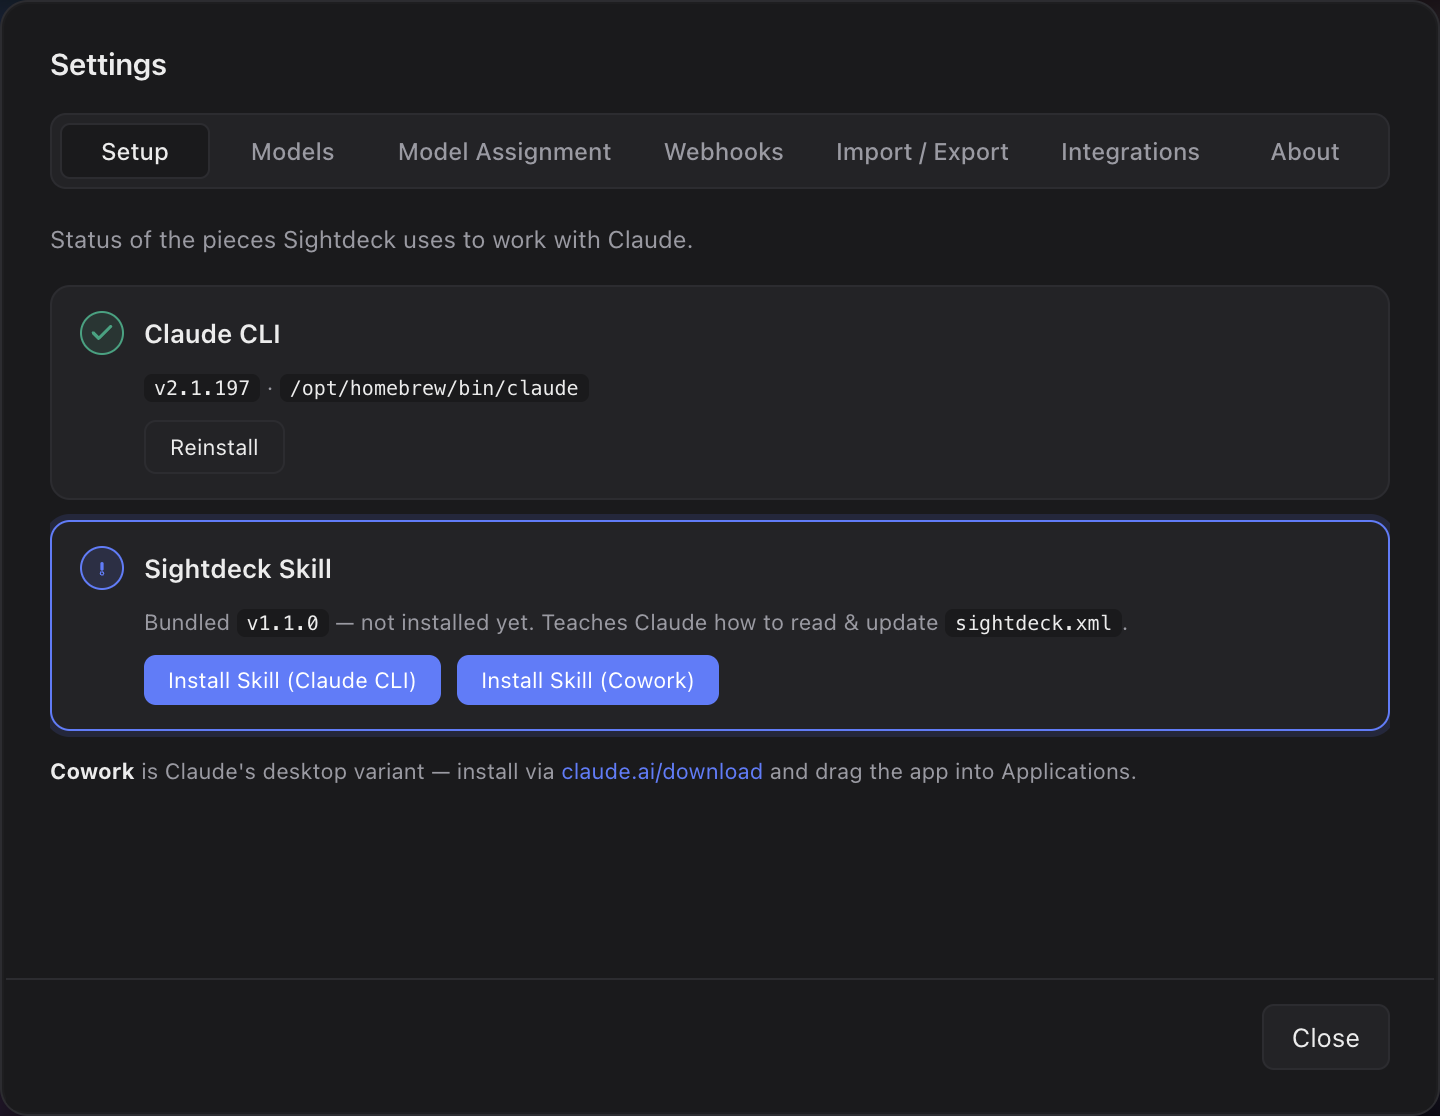
Step 1 — Add a provider
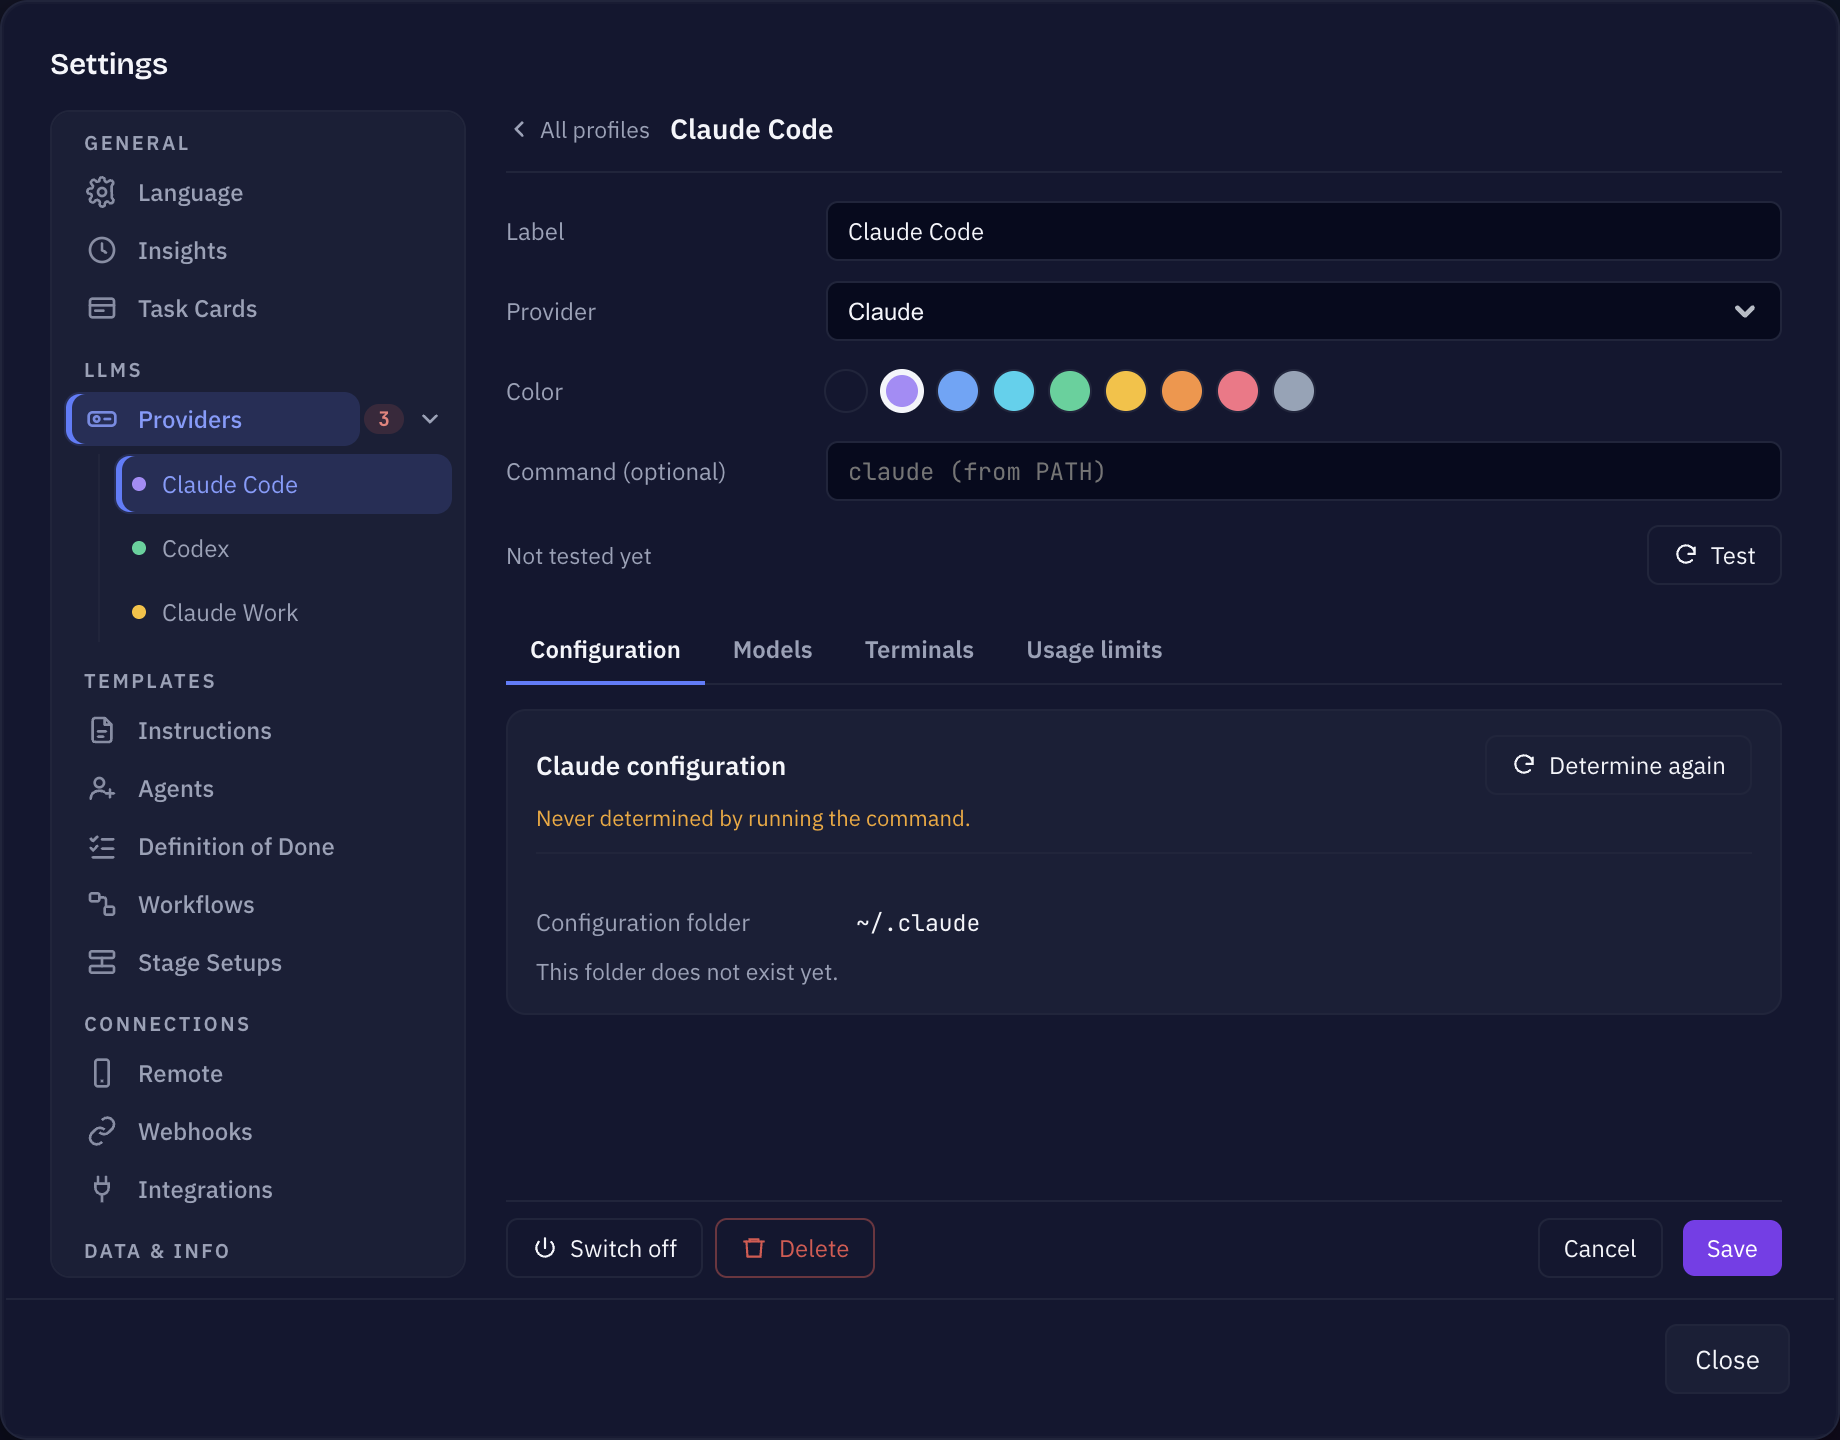
A provider tells Sightdeck which agent runs your tasks and which command starts it. Nothing can run until there is one — the sidebar shows No provider until then.
- Click Add provider in the setup steps. This opens Settings → Providers (later you get there through the cog at the bottom of the sidebar).
- Click Add profile.
- Give it a Label, pick the Provider — Claude or Codex (beta) — and a Color you will recognise it by.
- Leave Command (optional) empty to use
claudeorcodexfrom yourPATH. Enter your own command only if you start the agent through a wrapper script or a second account. - Click Test. The status turns to Available when Sightdeck finds the agent.
Every project you add afterwards starts on the first provider that is switched on. You can change that per project later. Everything about profiles — models, terminals, several accounts — is on Providers.
Step 2 — Check the agent
- Claude. The step Install Claude CLI only reports what it finds: Found with the version and path, or Not detected on your PATH. Install Claude Code yourself, sign in once by running
claudein a terminal, then come back — the step turns green. - Codex. The step reads Install Codex. Sightdeck cannot install or detect Codex for you here: install it yourself, sign in, then use Test on the provider page to check that Sightdeck finds it.
Step 3 — Install the Sightdeck skill
The skill teaches the agent how to read and update your tasks, so the board always shows the real state of what it is doing. It is installed per provider folder, because every agent reads its skills from its own place.
- Open Settings → Providers, open your profile and stay on the Configuration tab.
- Under Skill folder, click Install skill. The line changes to Skill v… — up to date.
- For a Claude profile the skill goes into that profile's configuration folder —
~/.claude/skills/sightdeck-aiby default, or the folder your own command points Claude at. - For a Codex profile it goes into Codex's own skill folder,
~/.agents/skills/sightdeck-ai.
- For a Claude profile the skill goes into that profile's configuration folder —
- Using Claude in Cowork as well? The Cowork button opens the skill in the Claude app; confirm the install there.
The setup step on the welcome screen offers the same with Install Skill (CLI) and Install Skill (Cowork). When a newer skill ships with an app update, the buttons switch to Update skill. More on the skill: Skill setup.
Activate your license
- Click the License icon at the bottom of the sidebar — or the Trial badge next to it.
- Paste the license key you received by email and click Activate.
- The window changes to License active and shows who it is licensed to and until when.
The key is checked on your Mac itself — activation needs no connection to our servers. That's the install done. Next, add your first project and run a task.